
Multiholder - Prototyping Board for the Arduino and Rasperry Pi (also fits the Pibow)
What started as a request by Nottingham Hackspace for some prototyping plates turned into three solid days of obsession.
Starting out with Oomlout's ubiquitous design (http://www.thingiverse.com/thing:716) ubiquitous for a prototyping plate or sledge as some call them my first obsession was making something a little bit special for the folks at the hackspace. An epic etch!

These are epic as they take a long time on the laser as it rasters the image. I've got a small laser cutter and it can cut four at a time but four of these etches was just too intensive for the benefits, when you consider that an Arduino and a breadboard where going to be stuck over the top of this beauty. Also adding outlines to the front of the board caused it to look busy. So I tried a couple of other etches.

You can see our logo on there for the first time. It was suggested that the boards were dual branded for the Arduino event at Nottinghack, but really I'd done very little to the design to warrant our design on the board without attribution and besides with our logo being so small it looked busy and the etch was crap. An attribution was added and a mention that we cut them.
Triple branding! Adding an Arduino Uno and a breadboard to this I was kind of happy, it was as good as the Adafruit board I'd received a few years back in my ARDX kit. It's neat and compact but ever so slightly squashed. The next stage should have been to tile the design and cut out en mass from the the laser cutter. But two things stopped me. First was the wastage on my acrylic sheets. We use a 300 x 200 sheet as standard. As our supplier ships 600 x 200 sheets that we cut down to fit into our machine. Seems like a long way around but the guys we use supply cast acrylic, which is rarer and much much better quality than the cheap extruded stuff you see all over the interweb. Second, someone tweeted a picture of Adafruit's new ARDX kit. A picture perfect in almost every way! I suggested that the Arduino was the wrong way around on their board, but the reply was it could go either way! WHat?! An improvement?! Also their board was roomier, and as we had all the extra acrylic why wasn't ours? The next iteration awaited!

Reversible. Neat etches. Room around the edges and one brand in the middle. Sweet. Also in opposition to the epic etch of earlier these were quick as we were no longer rastering but cutting at low power. At least four times faster. Still could do with some pazazz. Enter fancy edge glow acrylic (and R2-D2)...

This version we loved and cut with aplomb. Lots of lovely colours were cracked out and we even used the DSLR for the first time in a while!

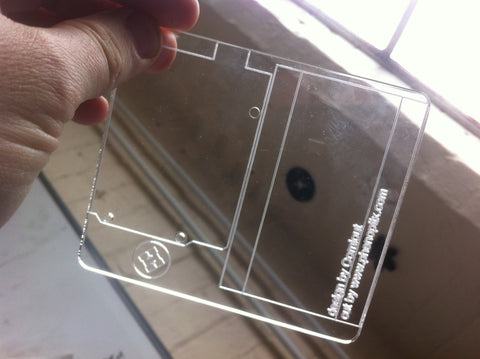
With enough cut for the Hackspace, happy with the work we rested. But then what? Wait? No? Why? Back in the depths of time, well November, we created the Pibow Proto Plate (http://www.thingiverse.com/thing:35376), why hadn't this been incorporated into the design? A plate that could hold a Raspberry Pi would surely be of some use as well as an Arduino and as bonus be used with the Pibow. So here we are:
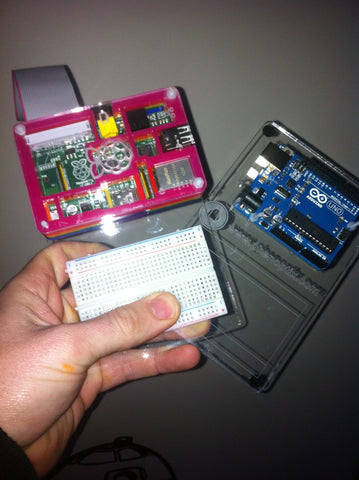
Again happy with the design, we move onto fancy acrylics

The result still owes a lot to the original design and it's great that it was provided under a licence where we can all benefit. Our design is also provided under the same licence so please copy, share and attribute. If you want a board but don't have a laser check out our listing here: http://www.phenoptix.com/products/arduino-prototyping-board-acrylic-plate-and-mounting-hardware
1 comment
Why is laser cut fluorescent perspex always so cool looking?!!!